The Checklist feature allows a user to create a daily “To-Do” list of items that can be checked off once completed. If the user has access to the “Manage Checklists” tab, they will be able to create a checklist for all stores they have access. If the user accidentally checks off the item, they can uncheck the item, however, they will have to explain why they are unchecking the item.

*NOTE: Video time stamps accompany each header referencing the video above.
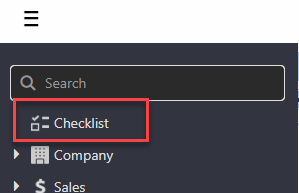
Accessing the Checklist [01:22]
Access to the Checklist is first managed in the Role Editor by checking the “Allow access to “Checklist” pop-up”. Once access is granted to the appropriate role(s), select the Menu and the Checklist will be listed at the top.
Checklist Window [03:06]
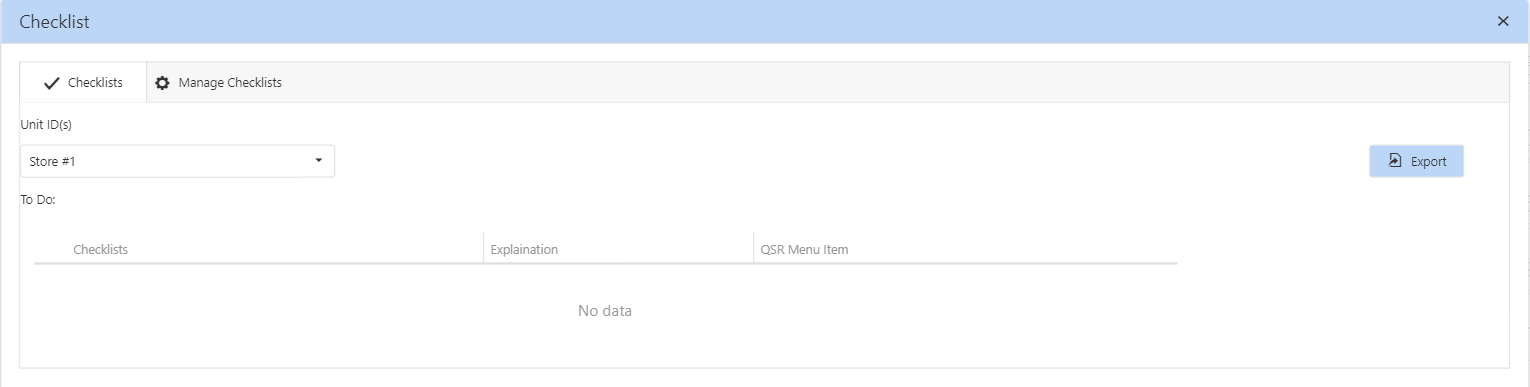
When a Checklist template has been created and/or edited within the Manage Checklists tab, you will have the ability to check off tasks within the Checklists tab.
-
- In the upper left-hand corner, select the Unit you would like to view.
- The window will automatically refresh to update the list of saved Checklists for the specific location and current day.
- The Checklist Window includes the following headers:
- To Do:
- Checklists
- Explanation
- QSR Menu Item
- To Do:
- Use the Export button to download and print the Checklists listed. When exported, there are four columns: Unit, Checklists, Status, and Explanation.
- Unit – The unit selected to complete the Checklist
- Checklists – The Checklist Template name, followed by the tasks associated with the checklist
- Status – Whether the tasks have been completed or not
- Explanation – A brief statement on why the task was unchecked (if applicable)
Manage Checklists Window [01:30]
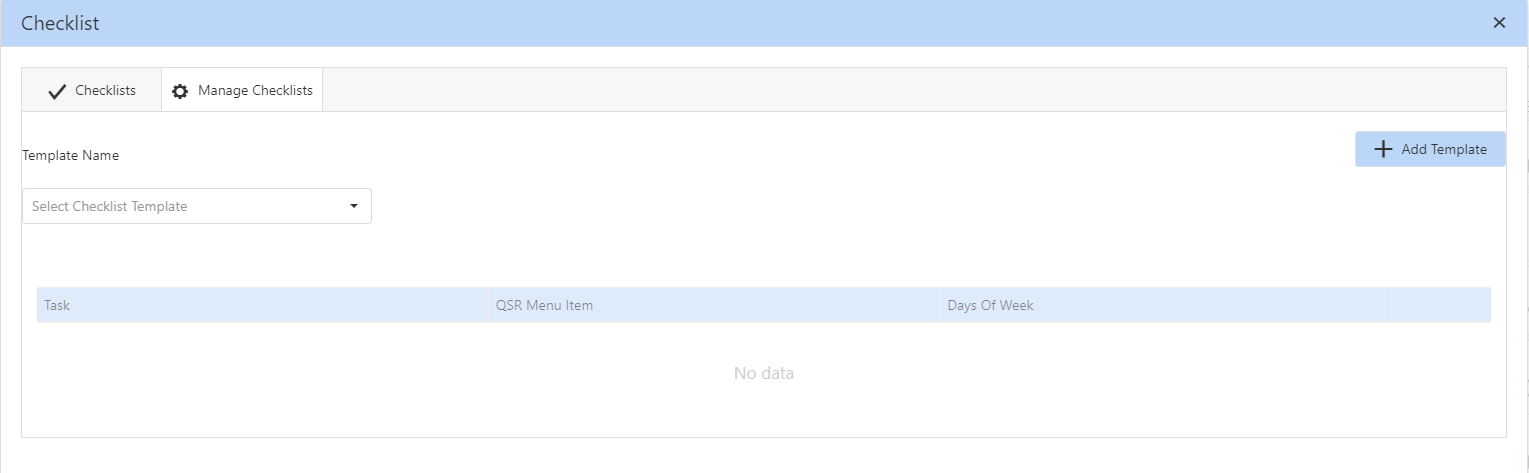
Access to the Manage Checklists tab is managed in the Role Editor by checking “”. To create a new or edit an existing Checklist, click the Manage Checklists tab at the top of the Checklist pop-up page.
Create a new Checklist:
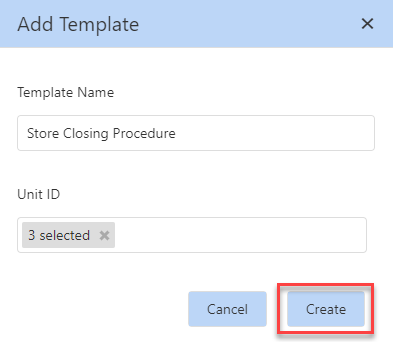
- Click “Add Template”
- In the “Add Template” window, type the name of the Checklist and choose the Unit(s) that should have access to the Checklist
- Click “Create”
To edit an existing Checklist template, select the template with the Template Name drop-down.
Edit Template Name and/or Unit(s) that have access to the chosen template:
- Click the pencil icon to the right of the drop-down box
- Make the desired changes and click “Save”

Add Task/Sub-Task
- Click the “Add Task” or “Add Sub-Task” button
- Add information to the fields listed below:
- Task – Name of the Checklist task [this is a required field]
- QSR Menu Item – QSROnline page that’s associated with the task (if applicable)
- Days Of Week – Day you would like the task to be completed
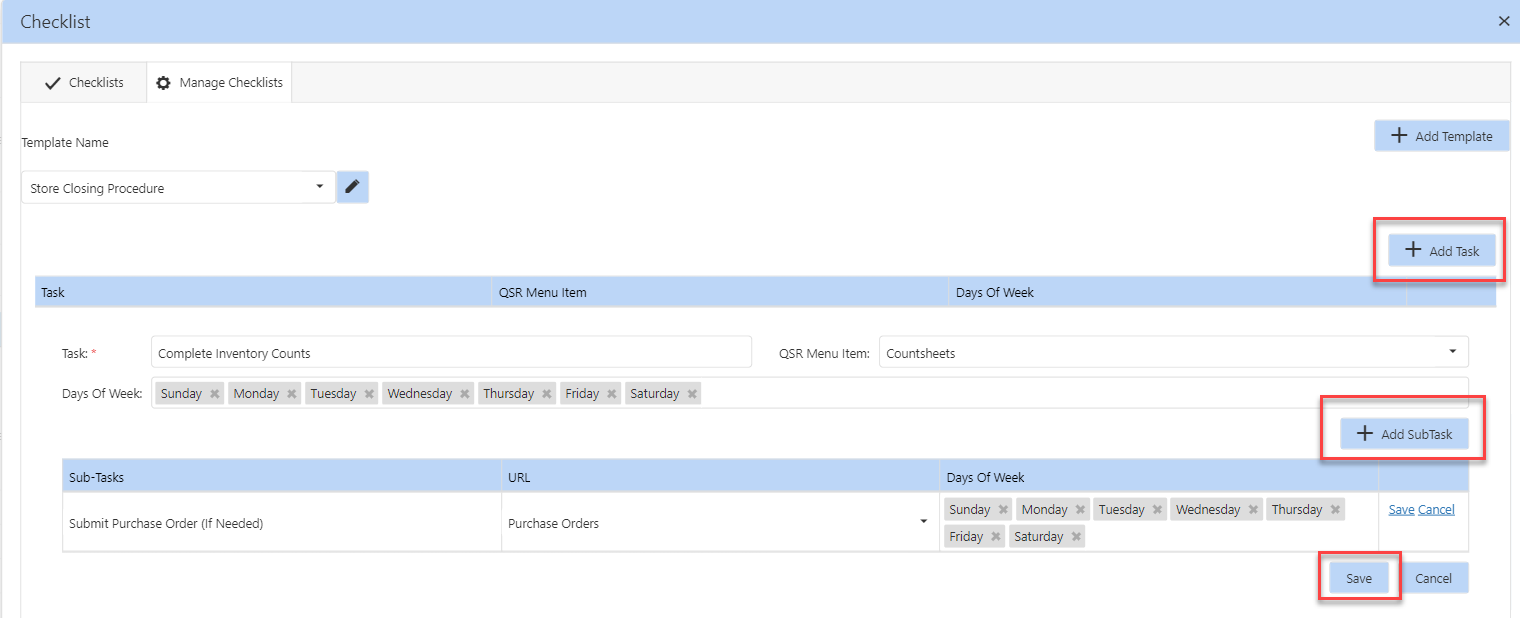
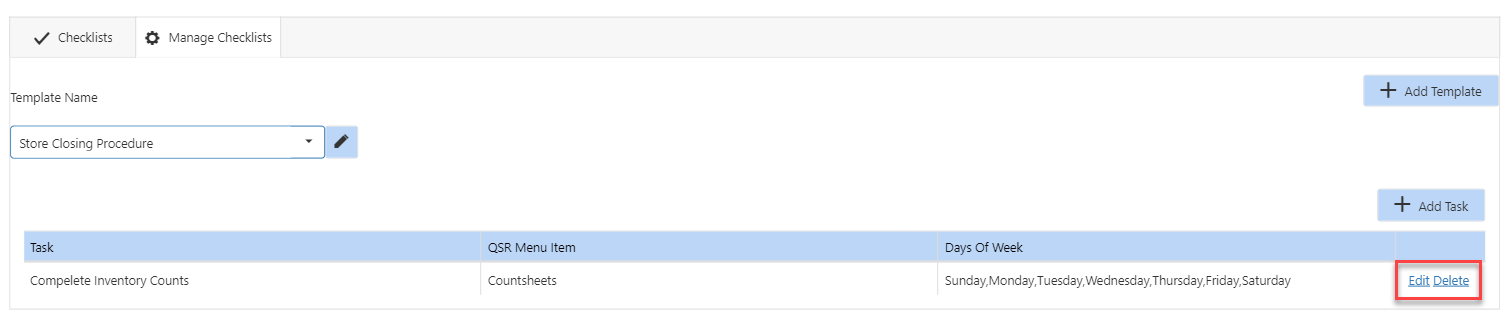
Edit
- Click the “Edit” hyperlink to the right of the task you would like to update
- Make changes to the desired fields and click “Save”
Once these edits have been made, the updates will be visible within the Checklists tab for the associated unit.
Delete
- Click the “Delete” hyperlink to the right of the task you would like to update
- When asked if you’re sure you want to delete, click “Yes”