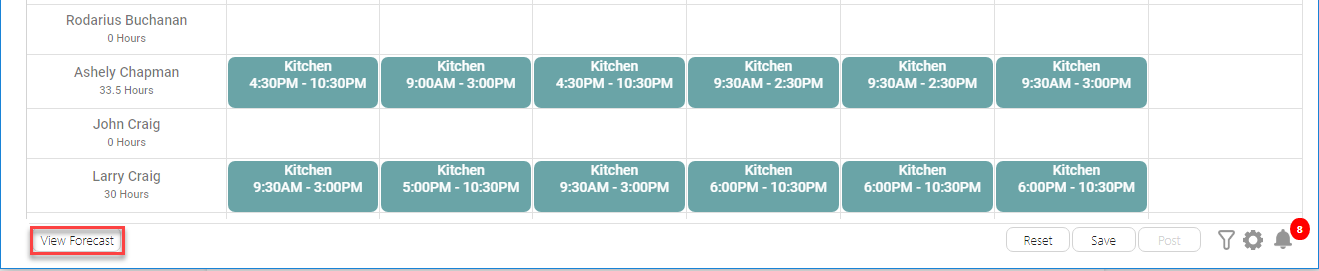
View Forecast
The “View Forecast” button will take you to the Sales Forecast editor which will load with the unit and week that you are currently working on within the schedule editor. For details on setting your sales forecast, see the Sales Forecast guide.
The View Forecast Button
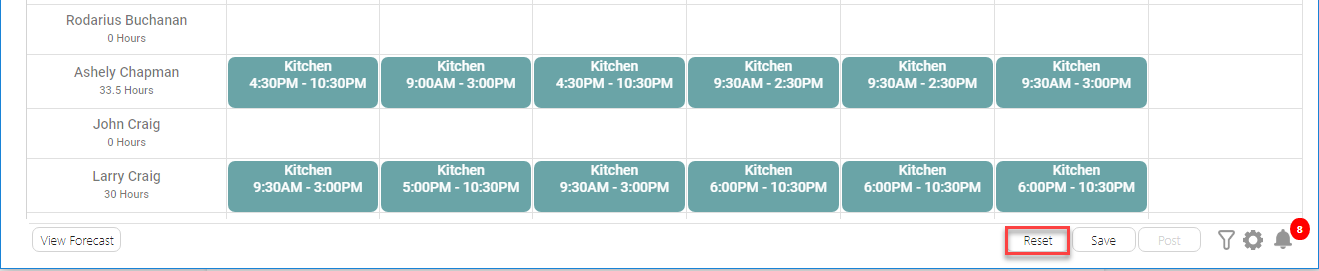
Reset
The Reset button will allow you to reset the schedule to the last saved version, effectively discarding all your unsaved changes. The Reset button only becomes enabled when there are unsaved changes.
The Reset Button
When resetting a schedule an alert will popup informing you that continuing will cause you to lose your changes.
Reset Popup Confirmation

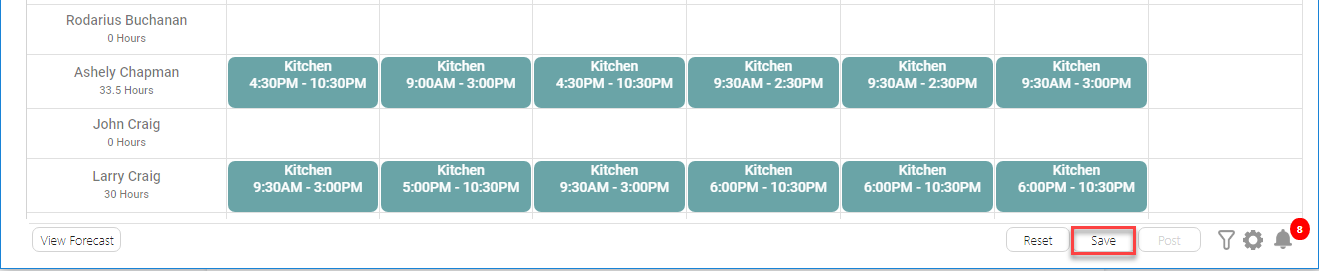
Save
The Save button will allow you to save your schedule changes. The Save button becomes enabled if there are unsaved changes and the schedule has not yet been posted. This can also be accomplished with the shortcut key combination Ctrl + S.
The Save Button Displayed In An Unposted Schedule
Schedule Saved Confirmation Message

After the schedule has been posted, the button text changes to “Save and Send.”
The Save and Send Button

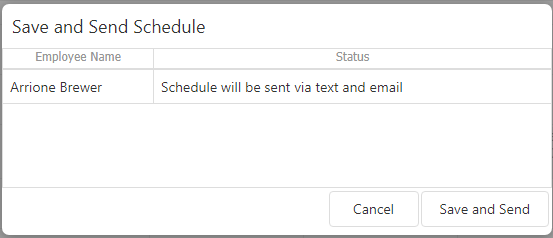
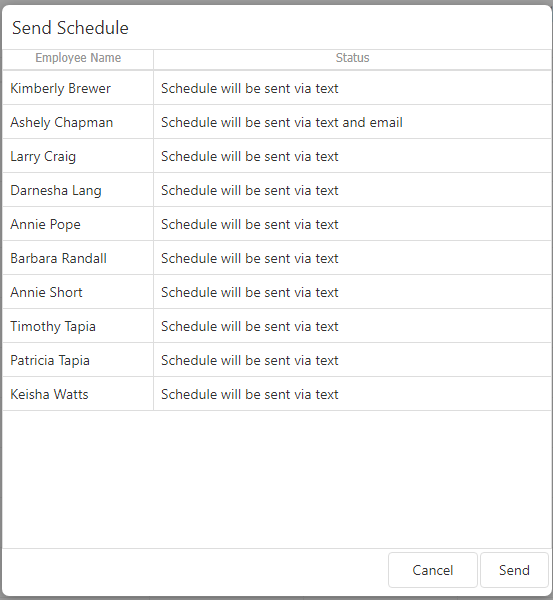
Clicking the Save and Send button will open a popup dialogue displaying the employees that will be notified that their schedules have been changed if you proceed with saving schedule changes.
Send Employee Schedule Popup
Post
The Post button allows you to post a saved unposted schedule, which sends each scheduled employee their schedule details prescribed by their schedule delivery settings. Once the schedule has been posted, it makes the schedule visible on the QSROnline Scheduling App.
The Post Button Visible In An Unposted Schedule Without Any Unsaved Changes

The Popup Shown When Post Is Selected For A Schedule That Has Not Yet Been Posted
The Message Displayed After The Schedule Has Been Successfully Posted To Scheduled Employees

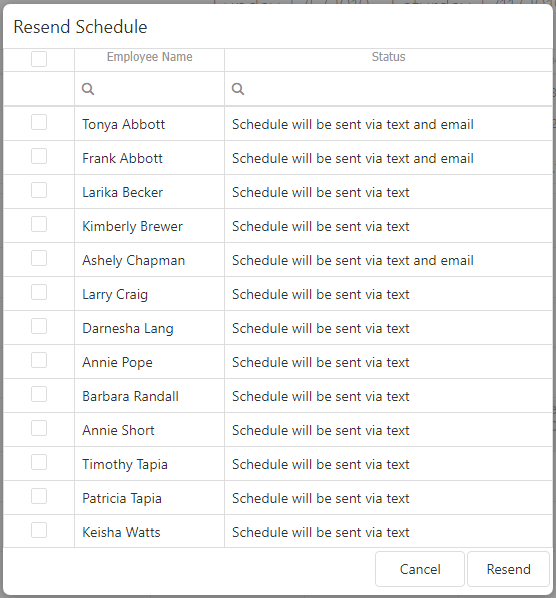
If the schedule has already been posted and made available to the employees, this button’s text will change to “Resend” since any subsequent saves to the schedule will be automatically sent to the affected employees. The resend functionality allows you to select a employee or multiple employees to resend their schedule.
The Popup Shown When Resend Is Selected, Allowing Scheduled Employees To Be Searched And Selected To Resend To.
Filtering
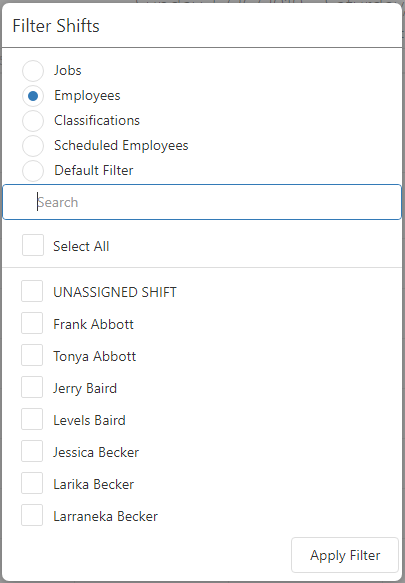
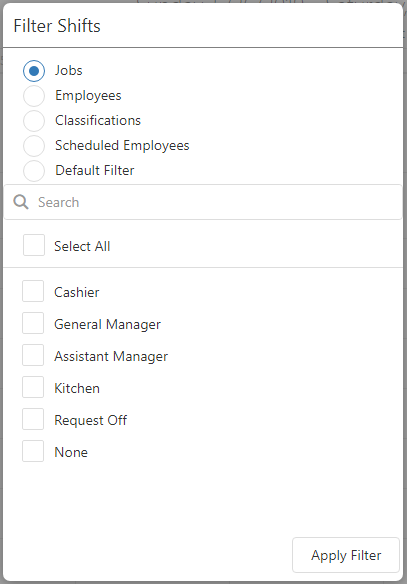
The schedule filter can be found in the footer by clicking the filter icon or at any time by using the shortcut key combination Ctrl + F. This will open the filter popup which allows you to select from multiple filter options including: Jobs, Job Classifications, Employees and Scheduled Employees.
- Jobs – Clicking the Jobs radio button will populate the filter list with all the enabled job codes for the store, allowing you to select the jobs you would like to filter.
- Employees – Clicking the employees radio button will allow you to filter to any active employee in the store.
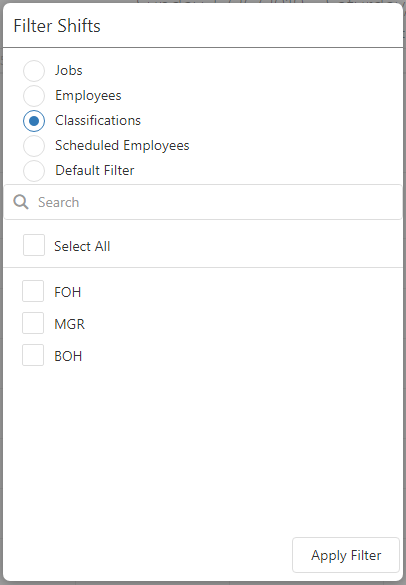
- Classifications – If the store has job classifications saved, the job classification radio button will be visible and allow you to filter to the job codes in each classification. Classifications are the equivalent of “Departments” for labor scheduling. A common example of popular classifications include: FOH (Front of House), BOH (Back of House) and Bar.
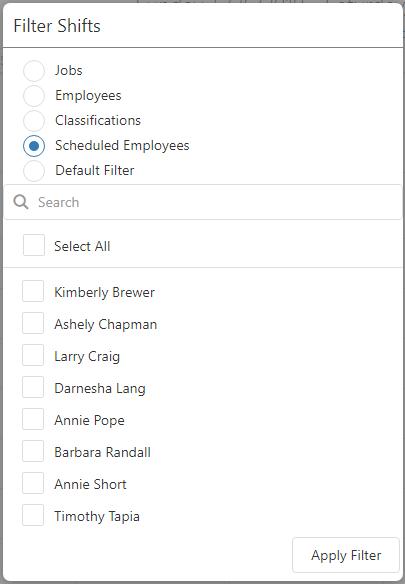
- Scheduled Employees – The scheduled employees radio button will populate the filter with just the employee names who are currently scheduled.
The Filter Icon That Will Open The Filter Options Popup In Addition To The Shortcut Key Combination.
The Filter Popup With The Employees Radio Button Selected, Displaying All Active Employees.
The Filter Popup With The Jobs Radio Button Selected, Displaying All Enabled Jobs.
The Filter Popup With The Job Classification Radio Button Selected.
The Filter Popup With The Scheduled Employees Radio Button Selected, Showing Only Scheduled Employees.
Schedule Options
Schedule options are located within a menu that can be accessed from the footer by hovering over or clicking the gear icon to the right of the filter icon. For details on the schedule options, refer to Schedule Options guide.
Alerts
The schedule alerts are indicated by the bell icon in the footer with a badge that indicates the number of alerts the currently loaded schedule contains. Clicking this icon will open up the schedule alerts popup, where the various alerts can be viewed. For details on schedule alerts, refer to Schedule Alerts guide.