Objective
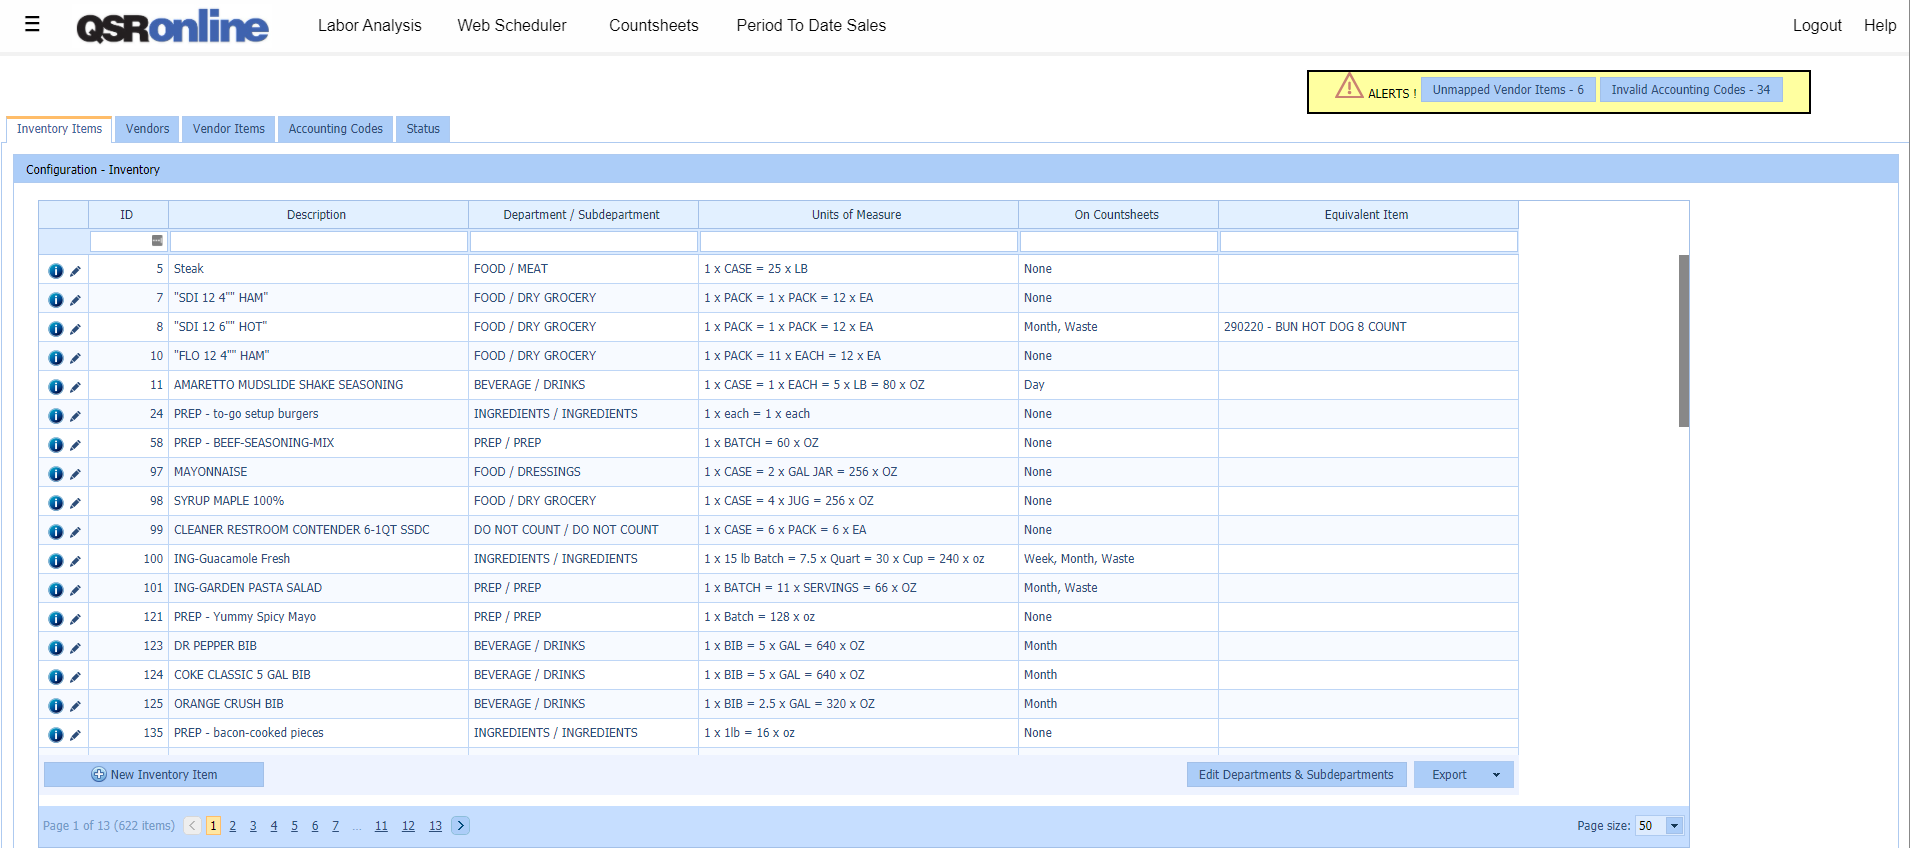
The objective of the Configure Inventory – Inventory Items Tab is to create and edit Inventory Items, Departments and Subdepartments. Countsheet Requirements and Reporting Unit of Measure will also be managed within the Inventory Items Tab.
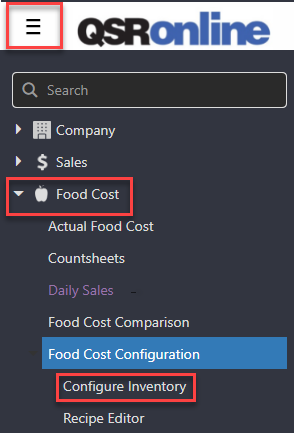
To access the Inventory Configuration:
- Click “Menu” > “Food Cost” > “Food Cost Configuration” > “Configure Inventory”
Features

- Filter/Search: Underneath the column headers, each column has a filter text box. In these boxes, you can filter inventory items by “ID”, “Description”, “Department/Subdepartment”, “Units of Measure”, “On Countsheets”, and “Equivalent Item(s)”.
- Sort: If you click on a column header, you will have the ability to sort the Inventory Items by the selected column.
- Adding New Inventory Item: At the bottom left-hand corner, click on “New Inventory Item”. A pop-up box will appear allowing you to add a new inventory item. Enter the required details and click “Save”. Refer to the “Creating Inventory Items” section below for detailed guidance.
- View Inventory Item Information: Click the “Inventory Item Information” icon (small blue circle with an “i” to the left of the inventory item). Refer to the “Inventory Item Information” below for detailed guidance.
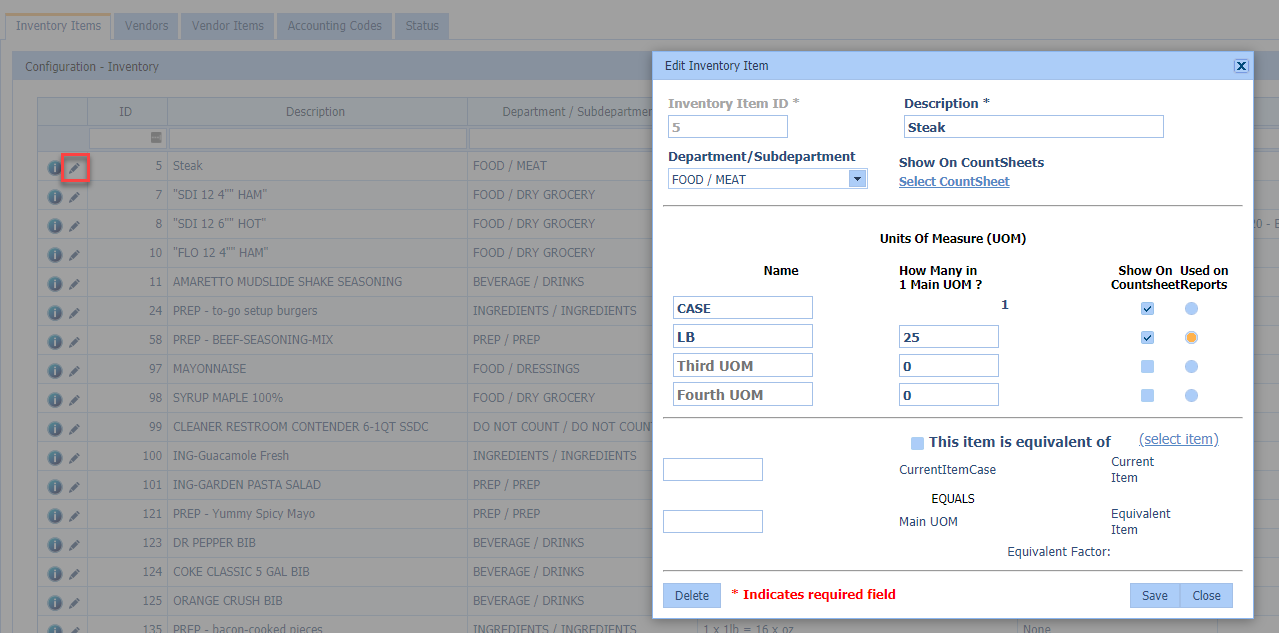
- Editing Inventory Item: To edit an existing Inventory Item, simply click on the “Pencil” icon to the left, or double-click on the item you wish to edit. The “Edit Inventory Item” box will appear allowing you to edit the existing item.

- Edit Departments & Subdepartments: At the bottom right-hand corner, click “Edit Departments & Subdepartments” button.

- Export: You can export the inventory items by choosing the “Export” button at the bottom right-hand corner. There’s an option to export as an XLS, PDF, and/or CSV file.
Creating Inventory Items
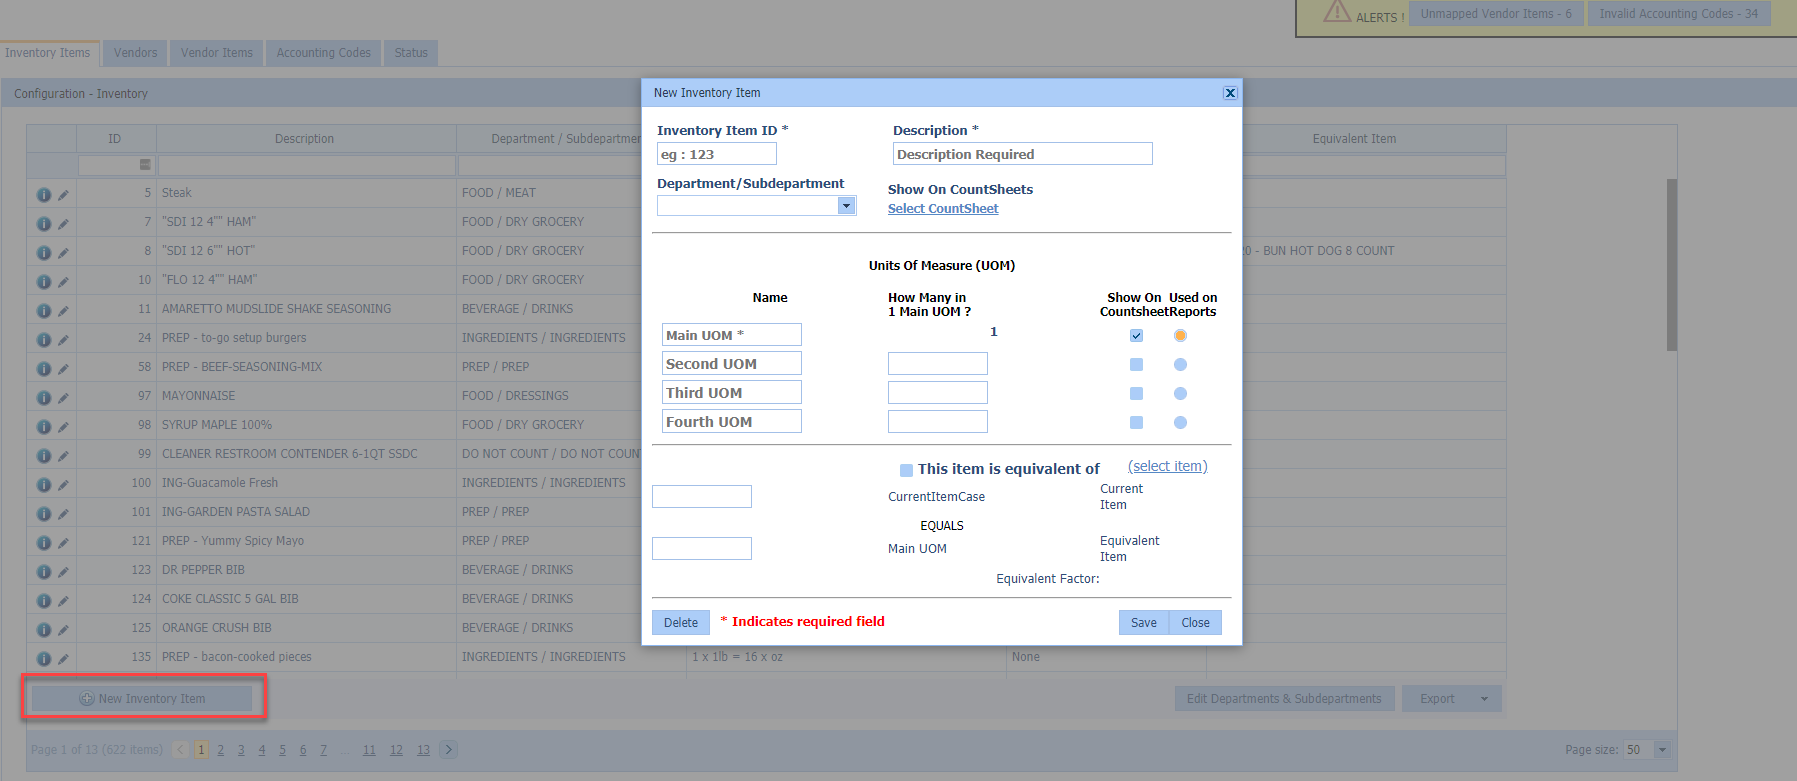
To create a new Inventory Item, select the “New Inventory Item” button at the bottom-left hand corner of the page.
Click to Zoom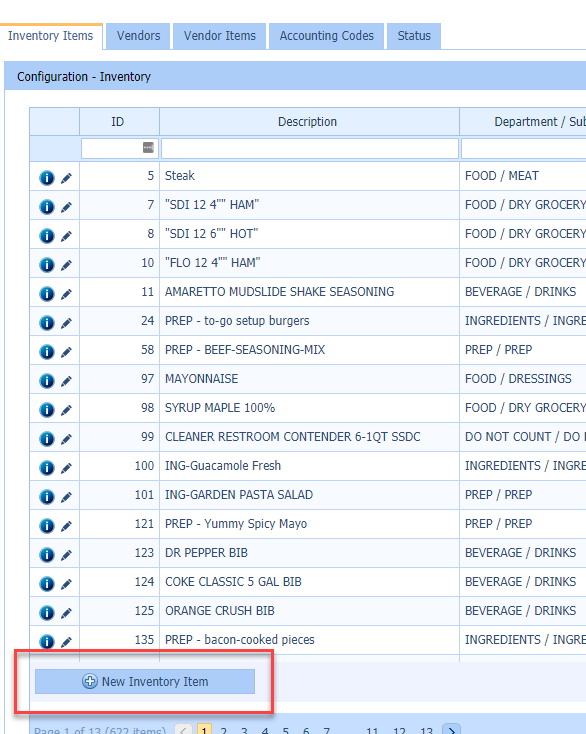
- The “New Inventory Item” box will appear and allow you to fill out the information needed to create the new item.
** In the following example, the new Inventory Item will be Turkey – Sliced with an item ID of 410.
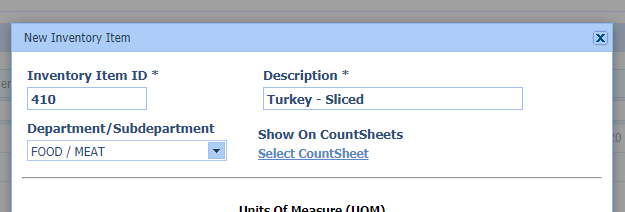
- Inventory Item ID: The Inventory Item IDs should be unique to each inventory item. In the “Inventory Item ID” field, key in the unique Inventory Item ID number for the inventory item. INVENTORY ITEMS CANNOT SHARE IDs.
- Description: Enter in the Inventory Item’s name/description within the “Description” field.
- Department/Subdepartment: Select the drop-down arrow and choose the Department and Subdepartment that the new inventory item belongs to.
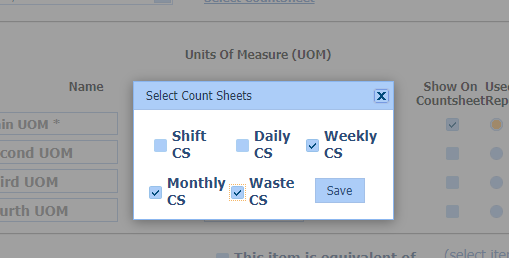
- Show on Count Sheets: You are given the option to show the new item on your “Shift”, “Daily”, “Weekly”, “Monthly”, and/or “Waste” countsheets. This should only be used for items that are required to count at ALL locations. Any item can be added to a countsheet by any store, but this requirement forces the item to show on the countsheet type for all stores.
** For this example, “Weekly”, “Monthly” and “Waste” countsheets have been selected by clicking within the box next to each of the options, creating a checkmark within each box.
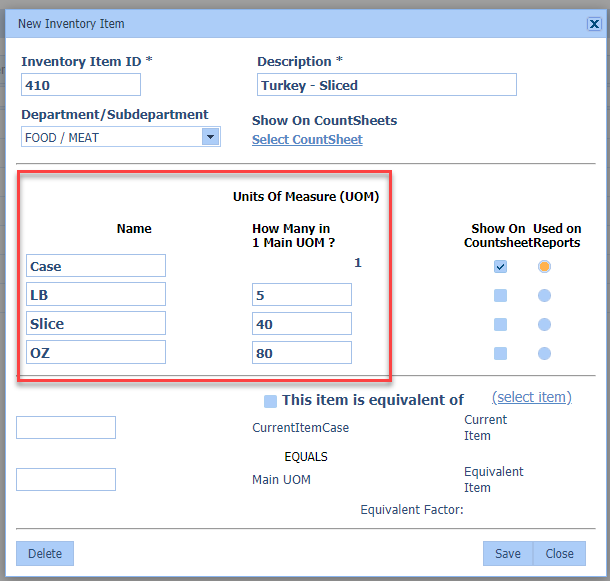
- Units of Measure (UOM): We recommend that the “Main Unit of Measure” entered here for the new inventory item be the same unit of measure used by the vendor item, as shown on the actual invoice.
- The following units of measure help break down your food cost.
- The second and third unit of measure are smaller than the main unit of measure.
** In this example, the “Main Unit of Measure” is Case and the 2nd UOM is pound (LB). There are 5 pounds in a case, therefore, we put 5 to show that 5 LB come in 1 Case (the Main UOM). Each slice is 2 ounces and there are 40 slices in a Case. So the 3rd UOM is Slice and the 4th UOM used here is ounce (OZ).
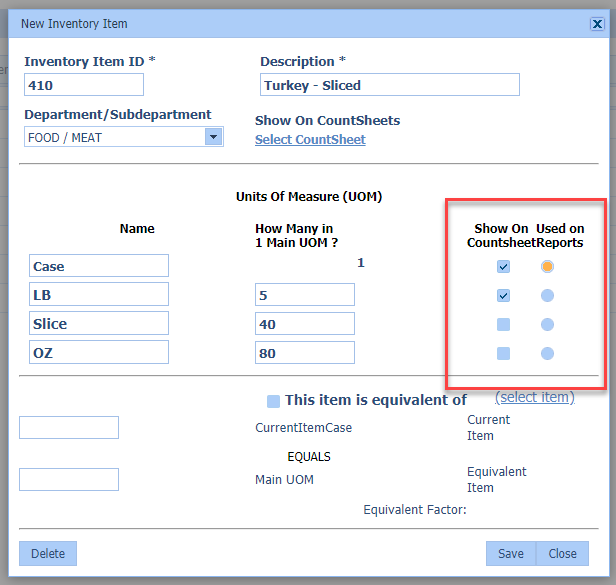
- Show on Countsheets: This section allows the user to select which unit(s) of measure will be listed on their countsheets for inventory counting purposes.
** Here we’ve chosen to ensure “Case” and “LB” UOM’s are visible on the countsheets.
- Used on Reports: This section allows users to select which unit of measure will be used to document usages within the food cost report.
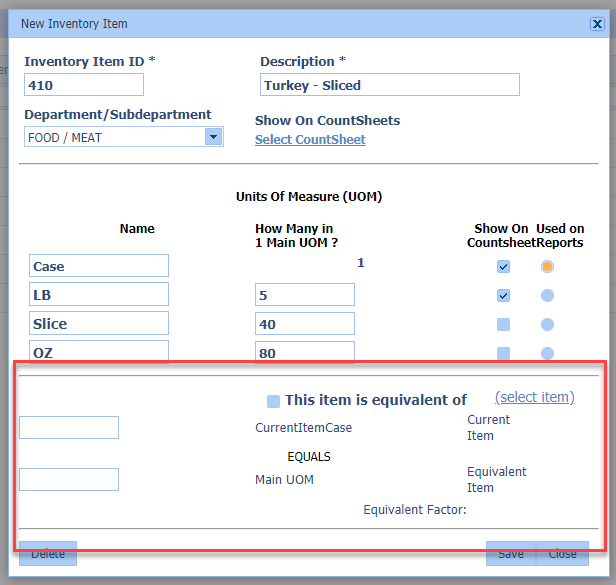
- Equivalent Item: The equivalency option is only used if the newly created inventory item is the same product as another inventory item.
** Since Turkey – Sliced is the only form of Turkey in the inventory list, this inventory item is NOT equivalent to another item. If Turkey – Sliced was equivalent to another inventory item, the check box would be checked here.
Inventory Item Information
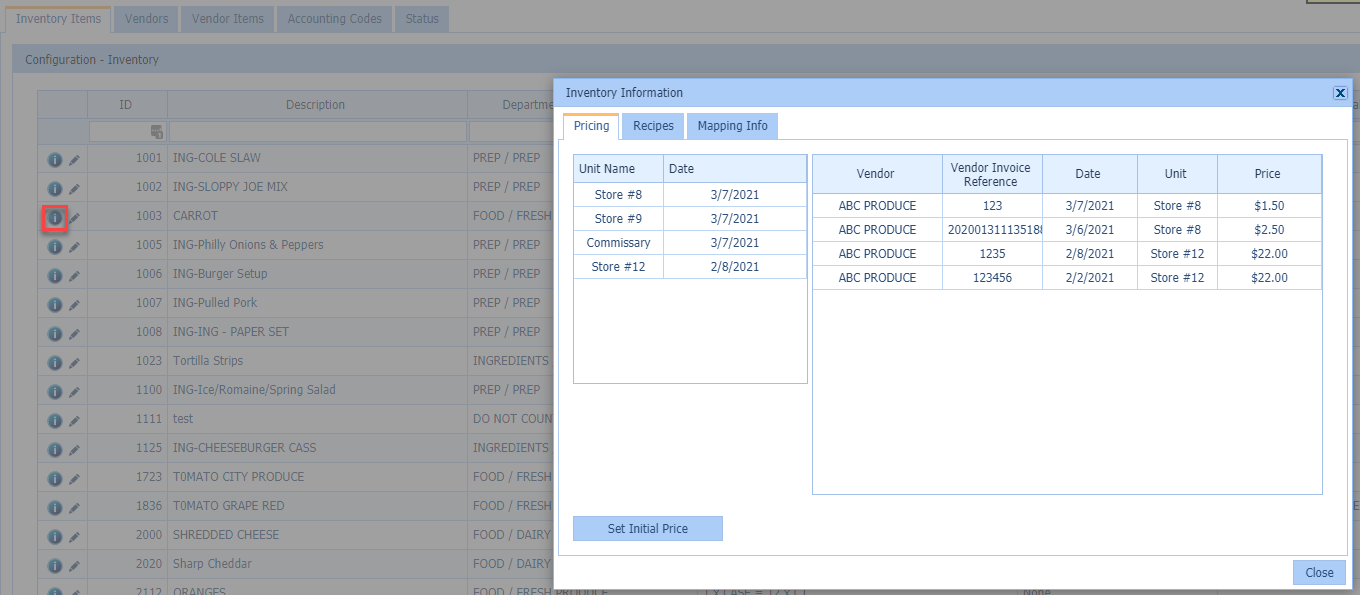
To view the “Inventory Item Information” for an Inventory Item, simply click on the blue circle “i” icon to the left of the item you wish to view. The “Inventory Information” box will appear allowing you to view additional details regarding the inventory item.

- Pricing: This tab provides information from all invoices the Inventory Item is featured on. You are able to view the Vendor, Vendor Invoice Reference (Invoice Number), Invoice Date, Unit that the invoice is associated with, and Price purchased as shown on invoice.
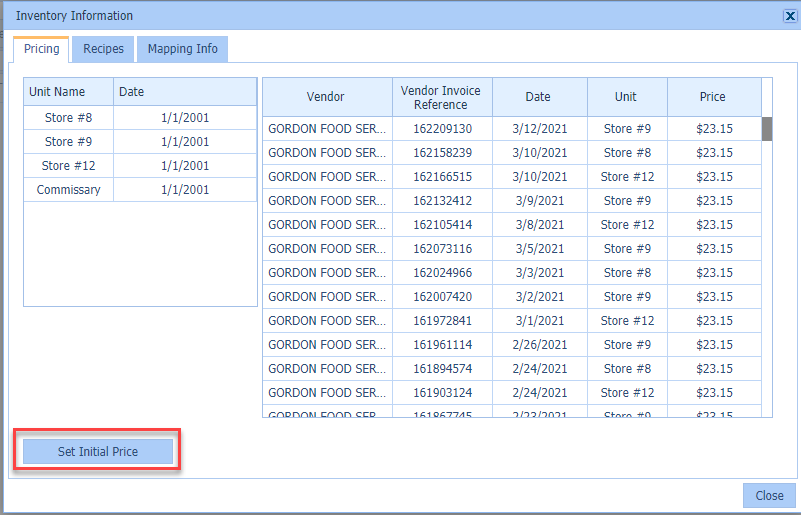
- Set Initial Pricing: This button will allow you to set an initial price for the Inventory Item.
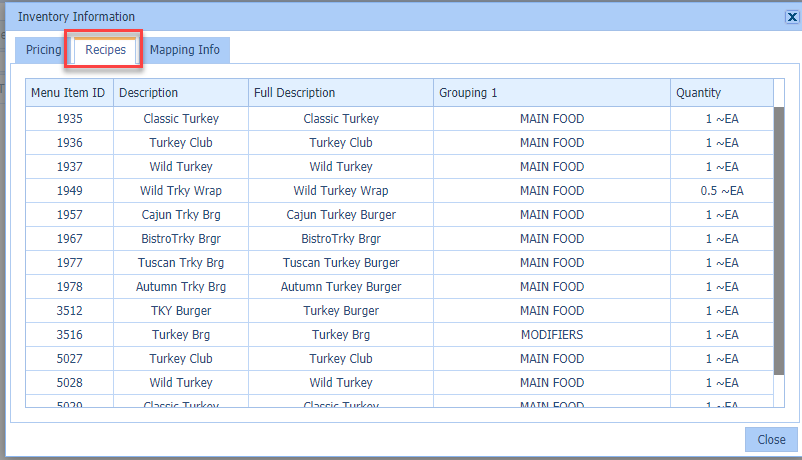
- Recipes: All recipes the Inventory Item has been added to will be listed here under the Recipes tab. You are able to view the “Menu Item ID”, “Description”, “Full Description”, “Grouping”, and “Quantity” the Inventory Item is used in the recipe.

- Mapping Info: All Vendor Items that are mapped to the Inventory Item you are viewing will be listed under the Mapping tab. You are able to view the “Item Summary” (Vendor & Vendor Item Name), “Unit” that the invoice is associated with, “Date” (Invoice Date), “Invoice Reference” (Invoice Number), and “Price” purchased as shown on invoice.
If you would like to view a specific invoice associated with the inventory item, you may double-click a row to open the invoice.
Editing Departments and Subdepartments
To edit the existing “Department” or “Subdepartment”, simply click the “Edit Departments & Subdepartments” button at the bottom-right of the screen under the inventory list.
Departments
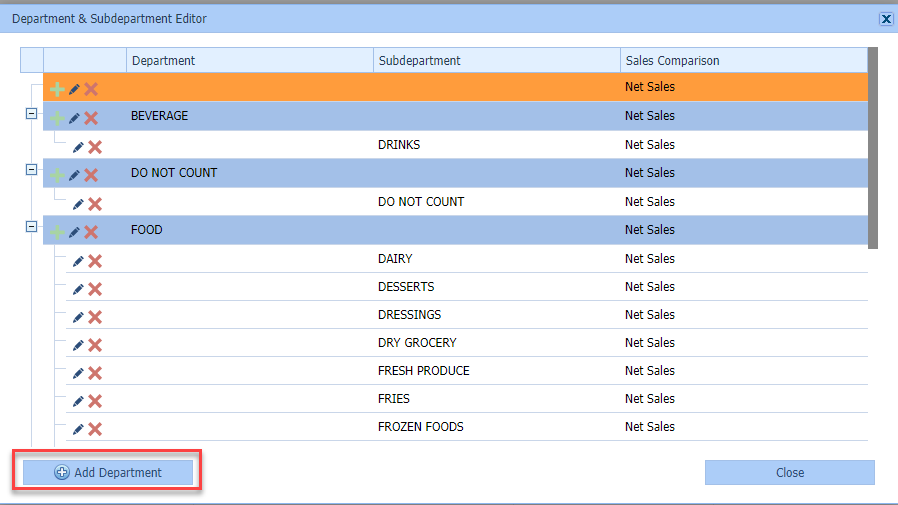
- Adding Departments: Choose “Add Department” at the bottom-left hand corner of the box.

- Type the name of the “Department” you wish to add and click the green checkmark shown to the left of the new Department name. This will add the new Department to your list.
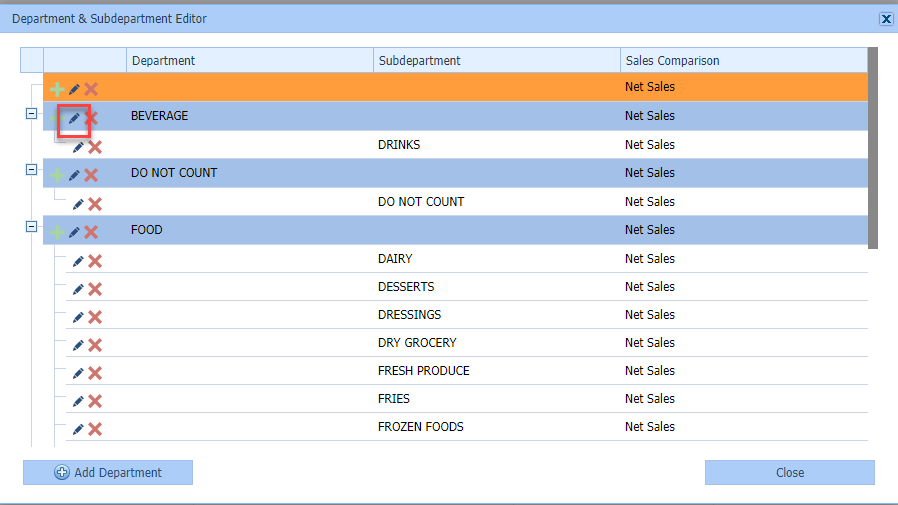
- Editing Departments: Select the small pencil icon to the left of the department you wish to edit.

- Deleting Departments: Select the red “X” to the left of the department you wish to delete.
Subdepartments
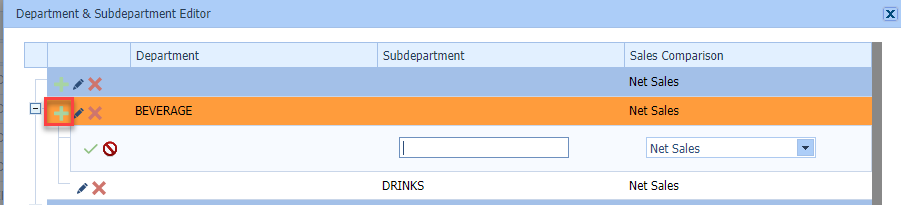
- Adding Subdepartment: Select the green plus sign to the left of the department you wish to add.

- Editing Subdepartment: Select the small pencil to the left of the department you wish to edit and click the green checkmark directly under the pencil to save your changes.

- Deleting Subdepartment: Select the red “X” to the left of the subdepartment you wish to delete. A pop-up box will appear asking for confirmation of the deletion – “Select Yes”.
Troubleshooting
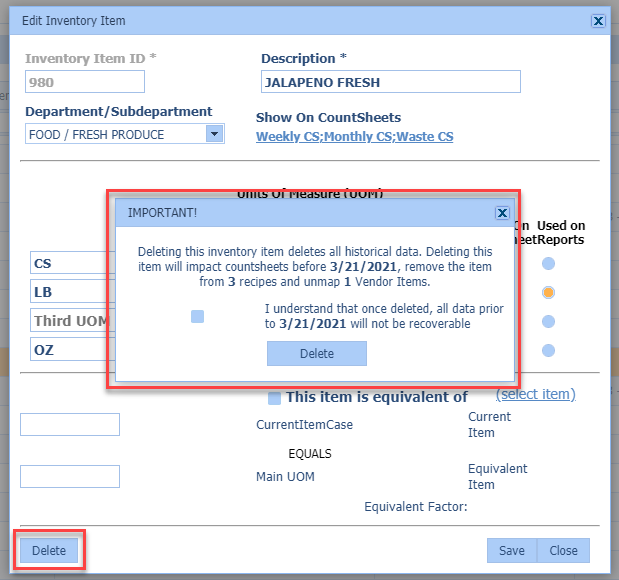
- Deleting an Item: If you would like to delete an inventory, please note that all historical information associated with the item will also be deleted.
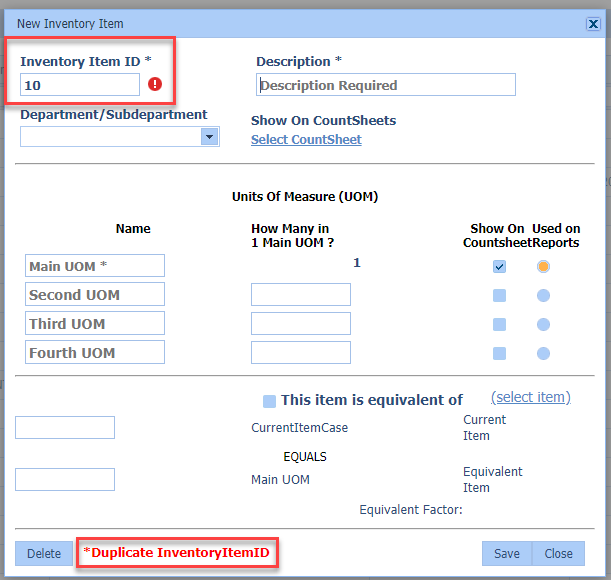
- When creating a new Inventory Item, a red exclamation mark next to the “Inventory Item ID” field indicates a duplicate Item ID, meaning the number used has already been used for another item.