The QSROnline Scheduler 2.0 provides managers with a proactive scheduling process, forecasting sales for upcoming weeks and projecting a labor force that meeting labor goals.
Previous Article
View Scheduler 2.0 Training Video.
Accessing Scheduler 2.0
To access Scheduler 2.0, click on the Time Keeper icon within the menu bar.
Employee List in Scheduler 2.0
The employees listed in Scheduler 2.0 are pulled directly from your POS. If you do not see an employee in the schedule, check the POS to ensure all fields are properly entered. QSROnline receives updated employee data at least once a day. Changes to an employee may appear the following day.
Removing an Employee from Scheduler 2.0
Employees in the Scheduler 2.0 can be removed by setting a termination date. Once QSROnline receives the data the employee will no longer appear on the schedule. If the employee has scheduled shifts these will be highlighted red and should be reassigned to another employee or deleted. Historical schedule data will keep this employee.
QSROnline Days Parts
The QSROnline Scheduler can show the total scheduled hours by day part. This is set by a company admin prior to using QSROnline. Check the Show Day Part Totals to see a summary on Time Line View.
Job Descriptions
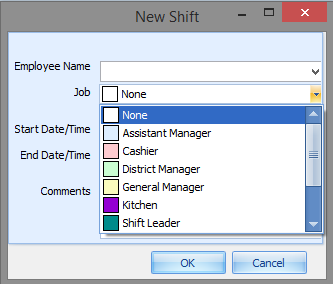
The list of jobs available to assign to employees is pulled from the available jobs in the POS. The list will match the Master Reference Unit or the main unit in QSROnline. This can be found by going to Menu, Company, Unit Editor. The Master Reference Unit is highlighted in green.
Settings
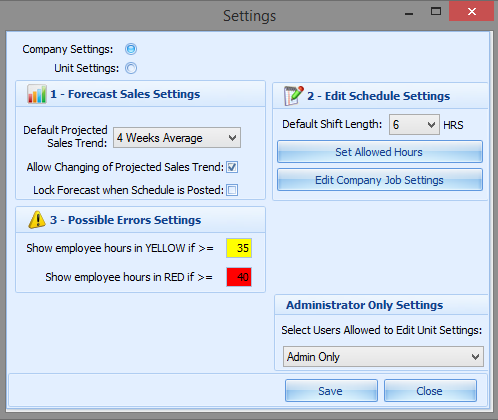
There are many default settings for the company or unit that can be set.
- Forecast Sales Settings – Set the default Sales Trend week average used for the company of by unit. You can check the Allow Changing of Projected Sales Trends if users can change the default amount used. Check the Lock Forecast when Schedule is Posted to keep the sales totals from changing. This is best used when the most recent week does not have sales for each day. For example, if I create my schedule on Friday the schedule will use the last 4 weeks of Thursday sales, but Friday will use the previous 4 as today’s sales are not available.
- Edit Schedule Settings – Set the default shift length when a new shift is added. See Allowed Hours for Set Allowed Hours. See Company Job Settings for Edit Company Job Settings.
- Possible Errors Settings – This tab (3), will show employees who have more than the total number of hours entered. Set the Yellow number to alert of potential Over Time. Set the Red number to alert of Over Time Hours.
- Administrator Only Settings – Choose if only an admin can adjust settings.
Allowed Hours
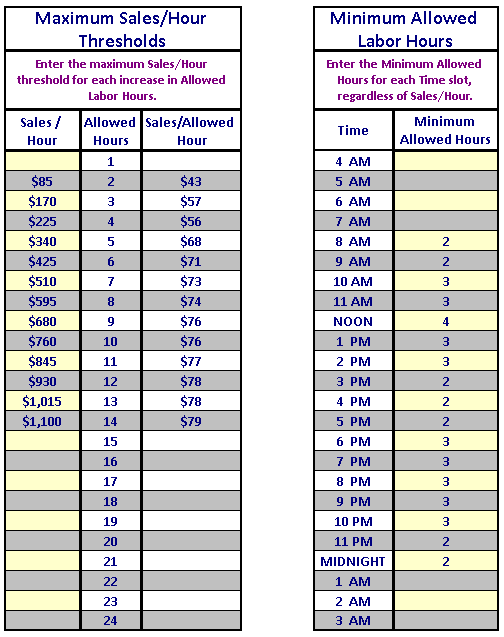
Allowed Hours provides a theoretical labor guideline. This tool provides a suggested number of employees who should be scheduled per hour based on forecasted sales and can be customized by location or for all locations. Detailed information about Allowed Hours can be reviewed in the Scheduler Allowed Hours Setup guide.
Company Job Settings
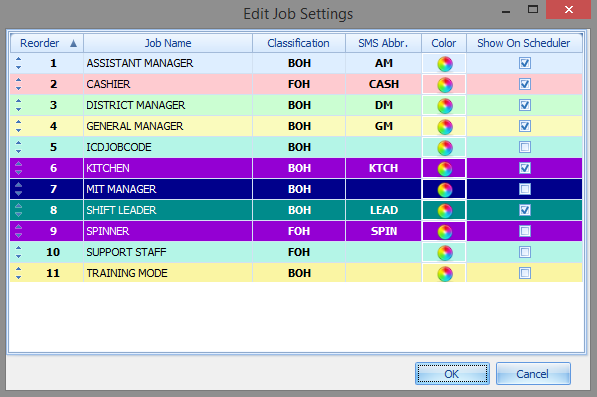
The Edit Company Job Settings Buttons allows you to edit the order the jobs appear when sorted by job, the jobs that appear in Scheduler 2.0, the colors associated with each job, and add a classification.
Setting Availability
Setting Availability in Scheduler 2.0 allows you to involve employees in the scheduling process. Set their times of availability to avoid scheduling conflicts. You may also easily record request off times within QSROnline if an employee does not have the QSROnline Scheduling App. Build schedules that not only work for your business but also for your employees.
Within the Edit Schedule tab, click on the Set Availability button at the top right of the window.
Setting Employee Availability is a crucial step in creating a schedule. It allows you to build schedules around your employees’ school and personal schedules. When trying to schedule an employee during a time they are labeled as Unavailable, you will receive an alert that notifies you that the employee is unavailable to work during that time.
Select the employee in the upper middle of the Set Employee Availability Window. Only active employees will show in the list.
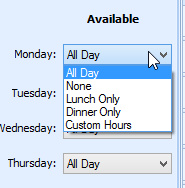
On the left-hand pane, you can use the drop down arrow next to each day of the week to select the following
All Day – Employee is not restricted
None – The employee cannot work on this day.
Dinner Only – The employee is available after 5 pm.
Lunch Only – The employee can work until 5 pm.
Custom Hours – Allows you to drag the Unavailable block to any specific time(s) as needed.
To save your employee’s availability, click the Save button.
Employee Request Off
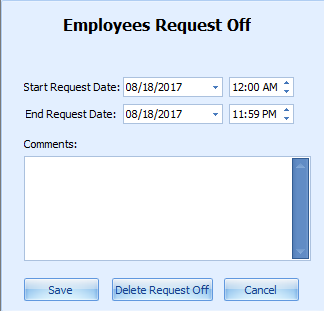
Within the Set Employee Availability window choose the employee from the drop down and click the Add Request Off button.
Set the Request start and end dates. Use the time if it is for a specific time of day for a selected day. By default, the times will set for the entire day.
Enter any comments regarding the requested time off. For example: “Requested 8-21-17 for a doctor’s appt.
Save the request off by clicking the Save button.
To delete an existing request off, click the Delete Request Off button after selecting the date.
Next Article


